
Artisan Bread
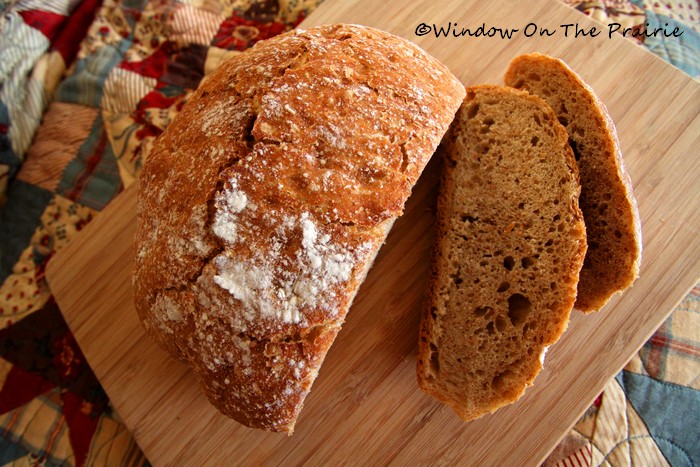
This is one of the easiest breads I’ve ever baked. It has fewer ingredients than most breads, doesn’t require kneading, rises in the same bowl where it is mixed, and has only one rising period. It has a wonderful thick chewy crust like old-fashioned hearth breads. And you don’t have to bake it right away. After the dough rises, you can let it sit for up to 24 hours before baking!
That’s right, if you’re not ready to bake, you can let let the dough sit until you are. So you can stir your ingredients together in the morning, and bake your bread when you get home from work. Or start your bread in the evening and bake it the next morning. I’ve started this bread after work one evening, and then baked it 24 hours later the following evening. It will wait for you until you’re ready, I promise.
This is a mixture of several different recipes I found online. I tweaked, baked, tested, and finally came up with a recipe I’m happy with.
INGREDIENTS
- 1/2 cup warm water(110-115 degrees F)
- 1/4 teaspoon active dry yeast
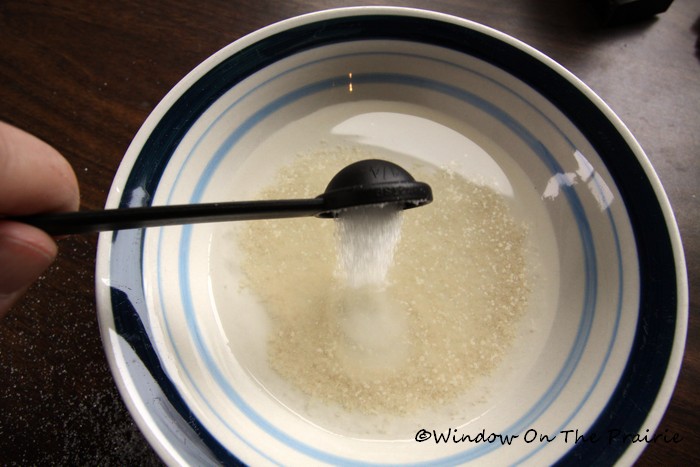
- 1/2 teaspoon sugar
- 3 cups all-purpose flour (can substitute up to 1 cup wheat flour)
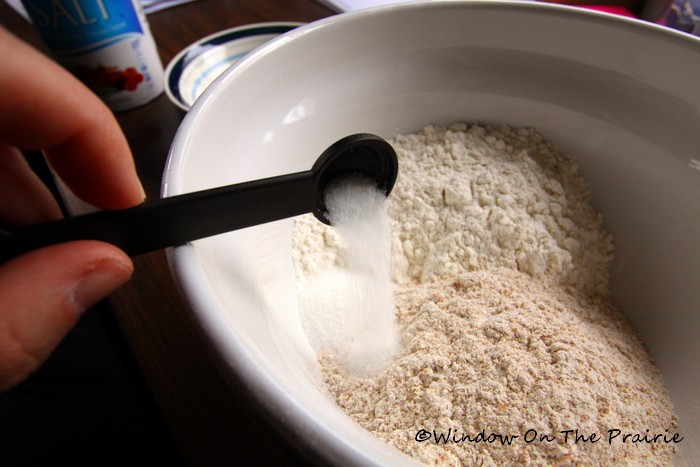
- 1 1/4 teaspoons table salt
- 1 cup warm water (110-115 degrees F)
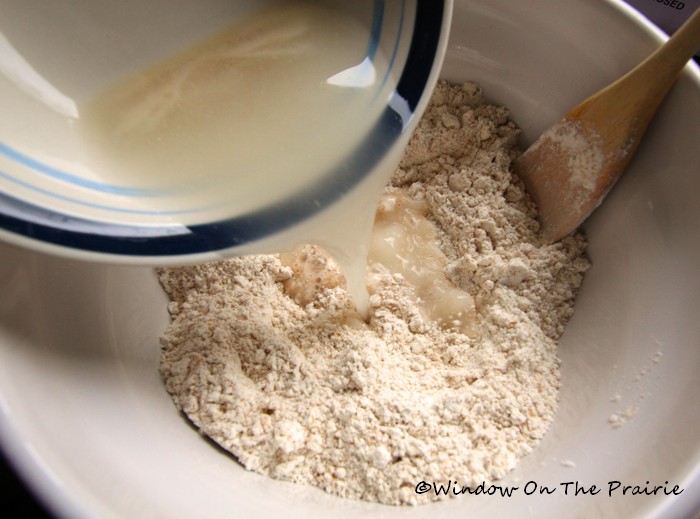
Stir yeast and sugar into the 1/2 cup warm water.
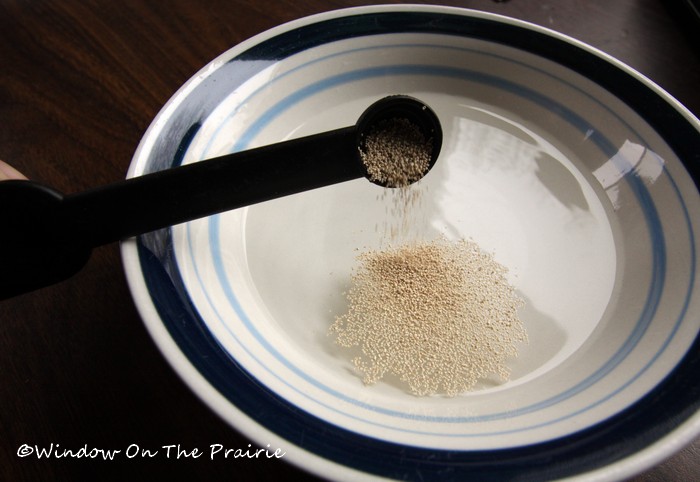
Let sit 5-10 minutes or until it begins to form a creamy foam on the surface of the water. The foam means the yeast is alive and well. No foam – throw it out.
In a medium mixing bowl add the flour. Here, I’m making a wheat loaf: 2 cups white all purpose flour and 1 cup whole wheat flour.
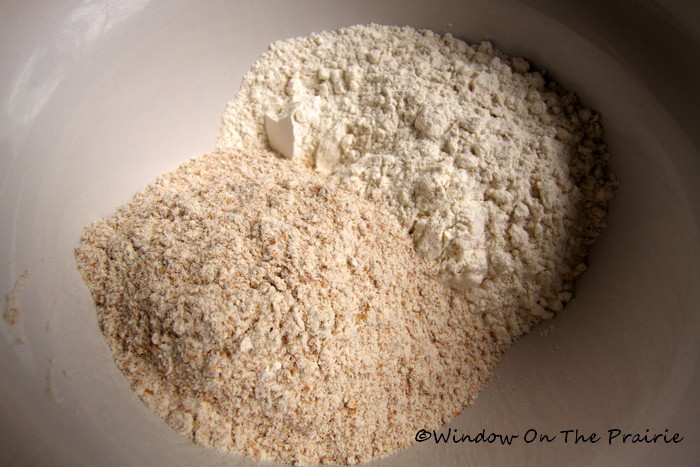
Add salt.
Stir well. Then pour in the yeast mixture
and 1 cup warm water.
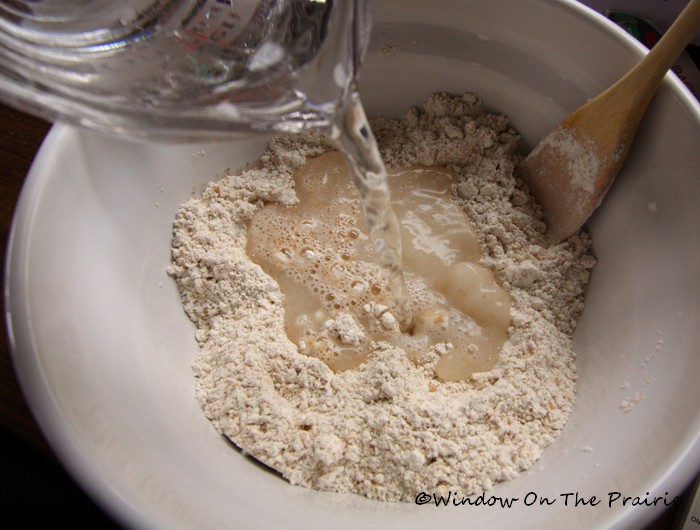
Stir well. Since this is a no-knead bread, all the blending occurs here so you’ll want to make sure all the ingredients are well mixed with one another.
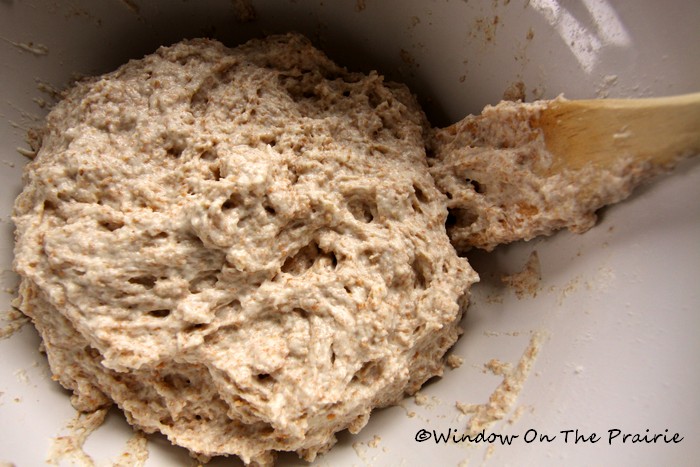
When done mixing, scrape the dough down the sides of the bowl and cover with plastic wrap. Place the bowl in a draft-free place.

Dough is ready to bake when it has doubled in size.
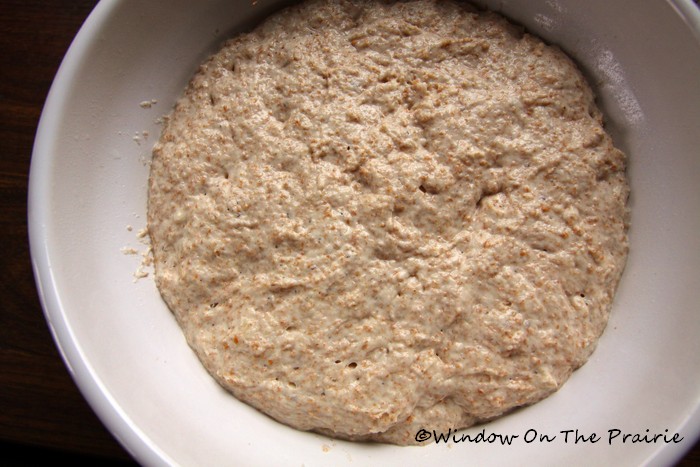
This occurs for me in about 4-5 hours. But remember, you don’t have to bake your bread when it is done rising. You can bake it anytime up to 24 hours later. It will wait for you.
Now, there are two secrets to getting the crispy chewy crust:
- A hot oven – 450 degrees F.
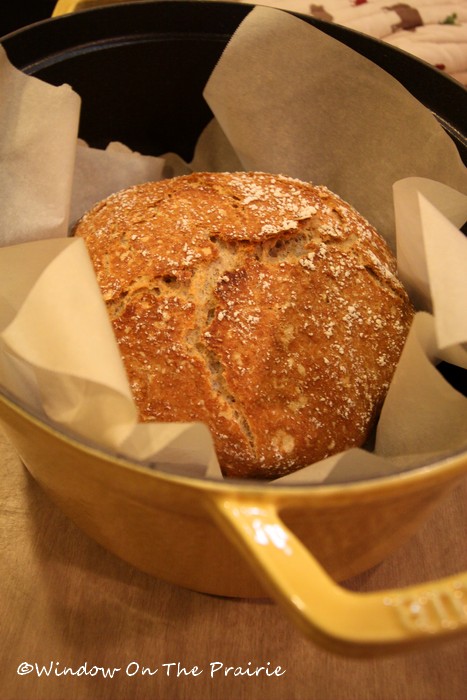
- The bread is baked not in a loaf pan, but in a pot with a lid. I have a Staub La Cocotte pot made of enameled cast iron. You can also use a Le Creuset pot, a clay pot with a lid, a pizza stone with an oven-safe bowl to cover the bread, a Pyrex baking dish with a lid, a baking dish covered with aluminum foil, or a cast iron dutch oven with a lid. Keep in mind that whatever you use, it must be able to take 450 degree F heat.

Place your pot in the oven and preheat at 450 degrees F. Do not grease the pot because at this high heat the grease with smoke like crazy. Don’t worry, the bread won’t stick. The secret is parchment paper. Trust me.
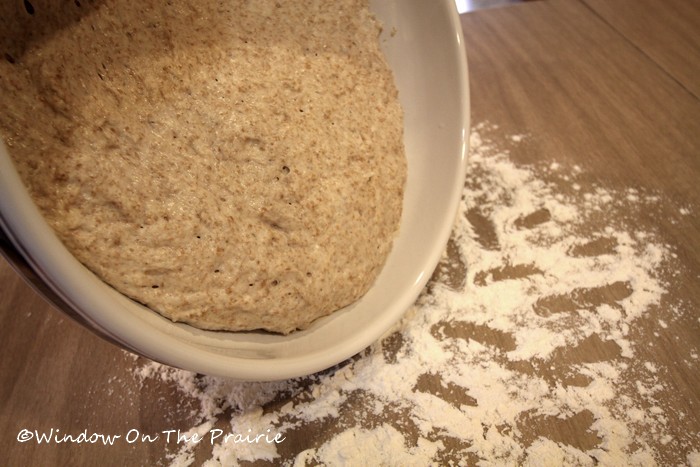
While the oven is preheating, place a sheet of parchment paper on your work surface and sprinkle liberally with flour. Dump your dough out of the bowl and onto the paper. Use a scraper or spatula. (Pretend there is paper on the table in the picture below – I forgot.)
With well-floured hands form the dough into a round shape by tucking the sides of your dough under.
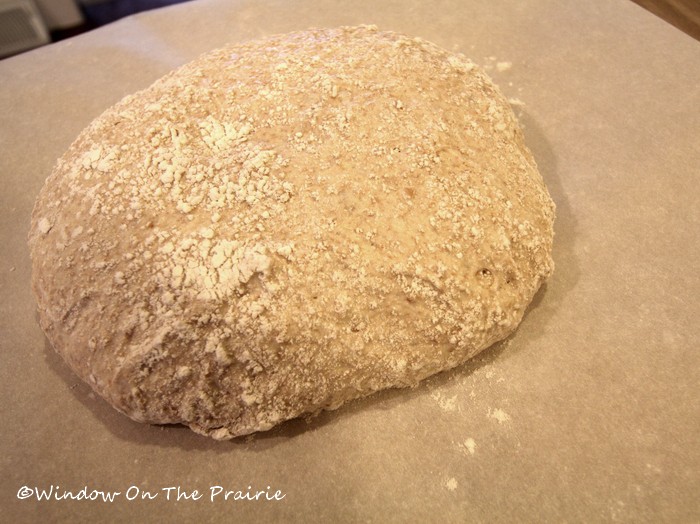
The dough will be really sticky. Just keep putting flour on your hands and do the best you can. It’s messy, but it’ll be alright. We just want a nice round shape.
When the oven is preheated, remove the pot from the oven and take off the lid. Be careful, it’s volcanic HOT. Gripping the sides of the parchment paper, lower the bread dough into the pot, paper and all.
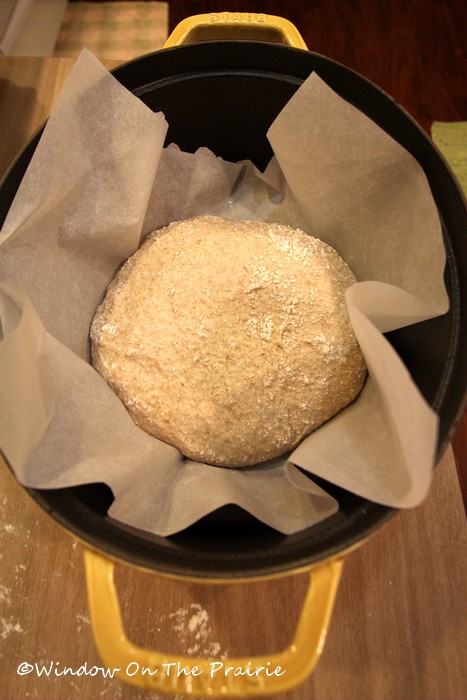
Again, don’t worry that you didn’t grease the pan, the paper will keep the dough from sticking. Carefully replace the lid and put in the oven. Bake for 30 minutes.
Then remove the lid,

and bake for another 15 minutes or until the bread is a nice dark brown.
Remove pot from oven
and then remove the bread from the pot and place on rack to cool.
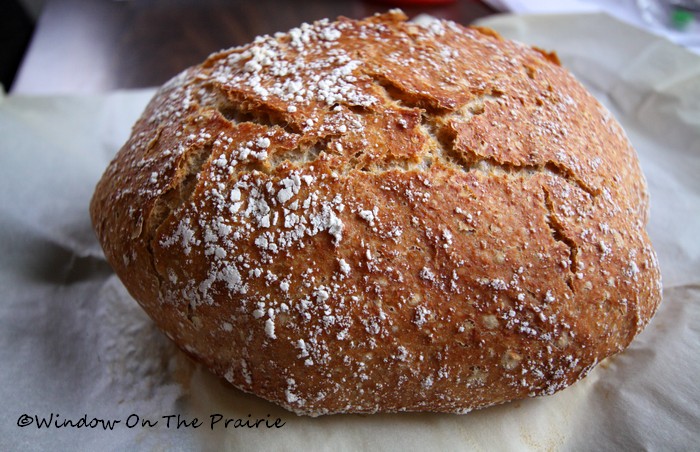
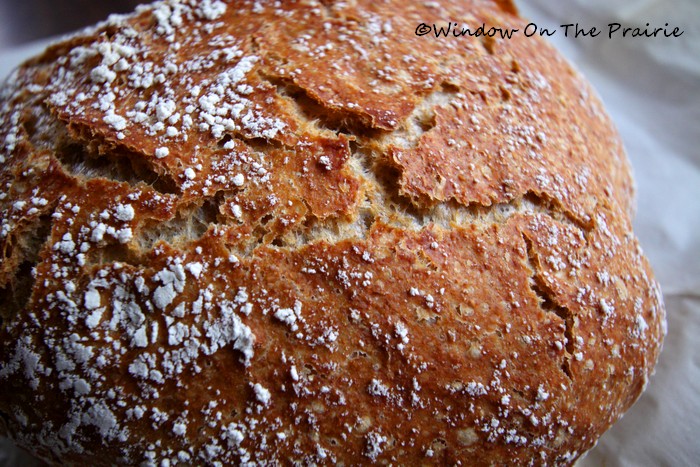
See how lovely the crust turns out?
When cool (if you can wait that long), slice your bread and enjoy.
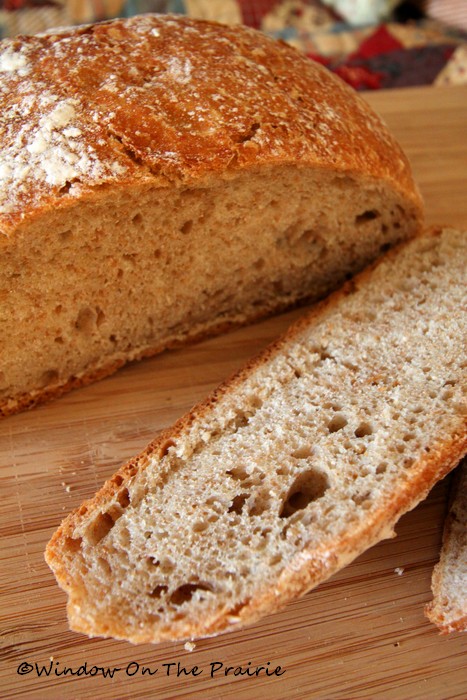
It can be spread with anything you like, or just toasted with butter. I like to warm mine in our toaster oven and spread with cream cheese.
Pat yourself on the back – you’ve made a beautiful loaf of bread.
Psst: Don’t tell anyone how easy it was.
xoxoxoxoxoxoxoxoxoxoxoxo


I didn’t know bread was so easy to make! I can’t wait to try this! Thank you Suzanne!
Yay! I love your bread posts. Your Honey Wheat Bread is pretty much my go-to bread. Also your Oatmeal Molasses Bread when I feel like changing things up. I’ve added this one to my recipe book and will give it a try!
Your first photo is eye-catchingly beautiful! I like the quilt in the background and the loaf looks tasty.
I have a similar recipe, Suzanne, and I can vouch for how easy…and how delicious it is!!
I have tried that recipe. .and it was SOOOO messy that I was pretty convinced that I had screwed something up. .glad to know that is standard!! My friend gave me a book full of different artisan bread recipes. .wish I had more time to experiment. .it does make a yummy loaf!! Or in our case, loaves!!!
I thought so too, because it is so moist. But the moisture is what makes the crust chewy.
I’m just trying to get an idea of the size of the loaf. Is your pot round or oval? Also, do you know what size your pot is? Maybe 6 qt or is it a smaller one? Looks wonderful. Thank you for doing all the hard work (tweaking) for us. I’ll be using my cast iron dutch oven.
The loaf measures 8 inches across/diameter. Hope this helps.
Oh, my, this looks wonderful!!! I’ve got to try this but no idea when I’ll have the chance…..life stuff to do.
Suzanne—I got a 7 quart Staub recently and I have to tell you this was the second thing we tried in it. I am so in love with this bread recipe, I can’t tell you. I had found a couple of others that were in French, so I was elated when I came across yours. I am posting about my bread and including links to this post. It will probably be up late this week or early next. I can’t thank you enough for this recipe!
I’m so glad you like this….happy bread baking!
Can you make this in a 3.3 ltr Staub Dutch oven? The instructions that came with my brand new dutch oven say not to heat the pot dry and empty. Can this step be omitted and the dough placed in a warm oven and gradually bring it up to heat?
Please advise.
Dianne
can we use just white all purpose flour and add cinnamon and raisins?
I love this recipe and use it all the time 🙂 thank you so much for sharing 🙂